
News News
Step by Step Cricket Bat Repair for Peak Performance Step by Step Cricket Bat Repair for Peak Performance
Cricket bats endure intense wear throughout matches and practice, leaving even the most passionate player searching for ways to restore their favourite blade. Tackling repairs yourself not only saves money but also offers a direct route to extending the life and performance of your bat. From gathering the right tools to mastering cricket bat repair basics, this practical guide walks you through each step so you can confidently bring your bat back to its best and ready for the next innings.
Table of Contents
- Step 1: Prepare Essential Tools And Workspace
- Step 2: Clean And Inspect The Cricket Bat Thoroughly
- Step 3: Repair Cracks And Surface Damage Meticulously
- Step 4: Sand And Refinish The Bat For Smoothness
- Step 5: Test And Verify Bat Readiness
Quick Summary
| Key Point | Explanation |
|---|---|
| 1. Gather essential tools and materials | Use linseed oil, sandpapers, wood glue, clamps, and cloths for effective bat maintenance and repairs. |
| 2. Clean and inspect the bat thoroughly | Examine the bat for cracks and structural weakness; ensure a clean surface before repairs. |
| 3. Repair damage with precision | Apply wood glue for cracks, use clamps securely, and sand down repairs seamlessly for best results. |
| 4. Sand and refinish for optimal performance | Sand the bat to remove imperfections, then apply linseed oil to nourish and protect the wood. |
| 5. Test the bat post-repair | Conduct a tap test and practice swings to verify the bat’s responsiveness and structural integrity before use. |
Step 1: Prepare essential tools and workspace
Successful cricket bat repair begins with meticulous preparation. Setting up your workspace and gathering the right tools will make the entire restoration process smoother and more effective.
Your repair toolkit should include several key items for comprehensive bat maintenance. Essential cricket bat repair tools include:
- Linseed oil for conditioning the wood
- Sandpapers with varying grit levels (120, 240, and 400)
- Wood glue for structural repairs
- Clamps or binding twine for securing repairs
- Clean, lint-free cloths
- Protective gloves
- Sharp craft knife
- Measuring tape
A well-organised workspace is crucial for preventing moisture damage and ensuring precise repairs.
Choose a clean, dry, and well-ventilated area with a sturdy work surface. Proper repair environment is essential for preventing additional wood damage during maintenance. Spread a protective cloth or newspaper over your workspace to catch any debris and make clean-up easier.
Top tip: Always work in a temperature-controlled environment between 18-22°C for optimal adhesive curing and wood treatment.
Step 2: Clean and inspect the cricket bat thoroughly
Thorough cleaning and inspection are critical first steps in cricket bat maintenance. Your goal is to identify any potential damage and prepare the bat’s surface for subsequent repair work.
Begin by carefully examining the cricket bat using natural light. Check the entire blade and handle systematically, looking for:
- Hairline cracks in the wood grain
- Surface wood splintering
- Areas of structural weakness
- Unusual colour changes or discolouration
- Damage around edges and corners
- Signs of moisture penetration
Close visual inspection reveals problems invisible during casual observation.
Using a soft, lint-free cloth, gently wipe down the entire bat to remove dirt, dust, and loose debris. Pay special attention to areas around the handle connection and striking surface. For stubborn dirt, slightly dampen the cloth with water, but avoid saturating the wood.
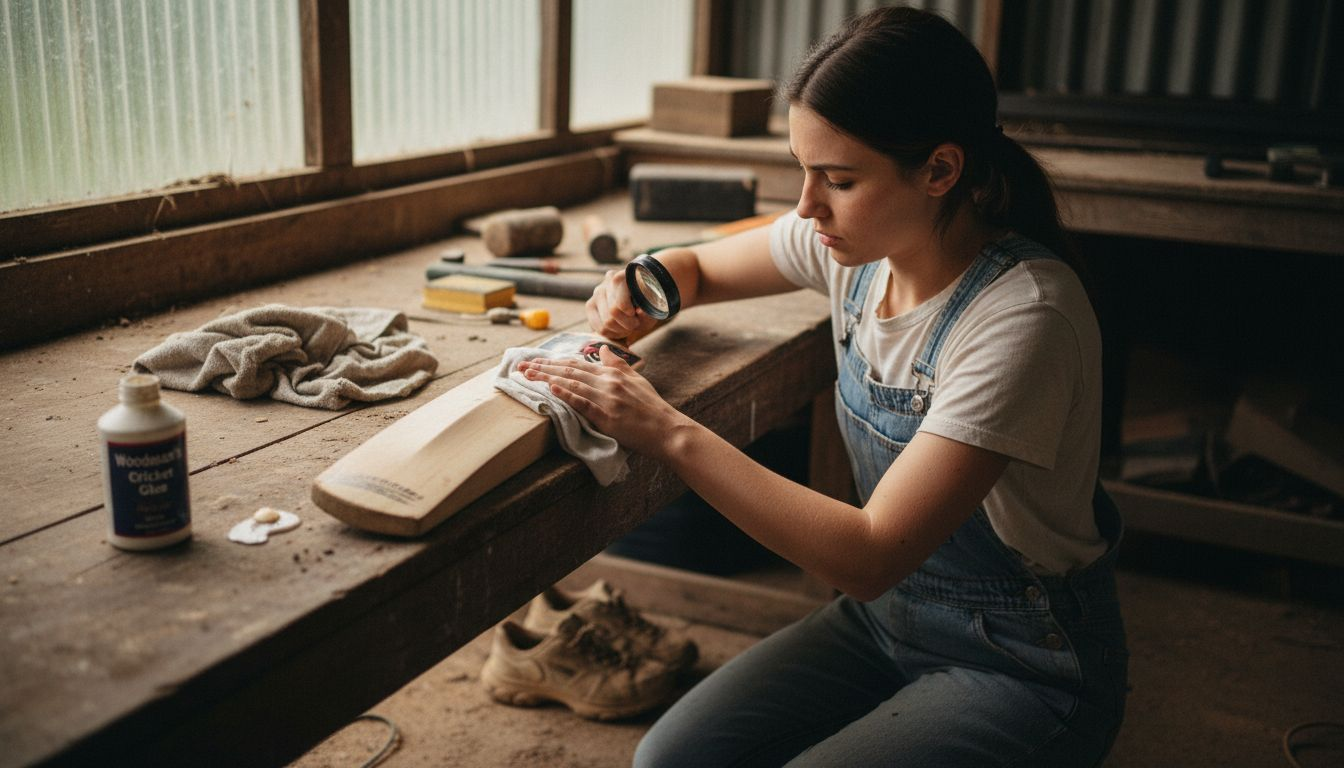
Expert suggestion: Use a magnifying glass to conduct a more detailed inspection, helping you spot microscopic cracks or damage that might escape casual observation.
Step 3: Repair cracks and surface damage meticulously
Repairing cricket bat damage requires precision and patience. Your goal is to restore the bat’s structural integrity and prevent further deterioration while maintaining its performance capabilities.
Cricket bat crack repair techniques involve several critical steps to ensure a robust and lasting fix. Start by selecting the appropriate repair method based on the damage type:
Here is a quick reference for cricket bat damage types and recommended repair approaches:
| Damage Type | Likely Cause | Recommended Repair Method |
|---|---|---|
| Hairline crack | General wear or ageing | Wood glue and gentle clamping |
| Deep split | Heavy impact or misuse | Glue, clamp, and reinforcing tape |
| Edge chipping | Repeated ball contact | Sanding and edge tape wrapping |
| Handle looseness | Poor fix or moisture | Wood glue and re-binding |
- Surface-level hairline cracks
- Deep structural splits
- Edge damage
- Handle connection weaknesses
Precision in repair work determines the future performance of your cricket bat.
For minor surface cracks, apply high-quality wood glue carefully into the crack using a thin applicator. Clamp the area firmly but gently to ensure the glue penetrates completely. For more substantial damage, consider reinforcing the repair by wrapping the area with protective tape after the glue has dried.
Once the glue sets, sand the repaired area smoothly using progressively finer sandpaper to blend the repair seamlessly with the surrounding wood. Finish by applying a thin layer of linseed oil to protect and seal the repaired section.
Expert suggestion: Allow at least 24 hours of drying time for repairs, and avoid using the bat until the glue has completely cured to prevent compromising the structural repair.
Step 4: Sand and refinish the bat for smoothness
Sanding and refinishing represent the final transformation of your cricket bat, restoring its pristine surface and protecting its structural integrity. This crucial stage determines the bat’s final performance and aesthetic quality.
Sanding techniques for cricket bats require a systematic approach to achieve a flawless finish. Begin with the following essential steps:
- Use progressively finer sandpaper (starting from 120-grit to 400-grit)
- Sand along the wood grain consistently
- Remove all surface imperfections
- Maintain even pressure during sanding
- Clean dust between sanding stages
Precision in sanding determines the bat’s final performance and durability.
Apply light, even strokes using each successive sandpaper grade, ensuring you remove previous scratches and create a uniformly smooth surface. After completing the sanding process, prepare the bat for oiling by wiping away all dust with a clean, lint-free cloth.

Finish by applying a thin layer of raw linseed oil, allowing it to absorb completely. This final treatment nourishes the wood, enhances its flexibility, and provides critical protection against moisture and environmental damage.
Compare the roles of sanding and oiling in bat refurbishment:
| Task | Purpose | Impact on Performance |
|---|---|---|
| Sanding | Smooths and removes blemishes | Improves strike and visual appeal |
| Oiling | Nourishes and seals wood | Increases flexibility and durability |
Expert suggestion: Allow the bat to rest for at least 12 hours after oiling, ensuring complete absorption and preventing excess oil from compromising your grip during play.
Step 5: Test and verify bat readiness
The final stage of cricket bat repair involves meticulously verifying that your restoration work has successfully returned the bat to peak performance. This crucial evaluation ensures the bat is safe and ready for competitive play.
Comprehensive bat testing methods require a systematic approach to assess structural integrity and responsiveness. Conduct these essential checks:
- Tap test along the bat’s surface
- Listen for consistent sound quality
- Check for smooth striking response
- Verify handle stability
- Examine visual alignment
- Test overall weight distribution
A well-repaired cricket bat should feel natural and responsive during initial testing.
Begin by gently tapping the bat with a cricket ball, paying close attention to any unusual sounds or vibrations. Rotate the bat systematically, checking for uniform response across different sections. Areas that sound hollow or produce inconsistent tones might indicate incomplete repairs or underlying structural weaknesses.
Finally, perform a controlled practice swing to assess the bat’s balance and feel. Your restored bat should move smoothly, with no unexpected wobbling or resistance that might compromise your playing technique.
Expert suggestion: Conduct your final test in similar conditions to your actual playing environment, as temperature and humidity can subtly affect bat performance.
Restore Your Game with the Right Cricket Bat
Maintaining your cricket bat to peak performance means addressing issues like hairline cracks, deep splits and edge damage with precision and care. If the repair process feels daunting or your bat has seen better days, upgrading to a new, high-quality cricket bat could be the game changer you need. Explore our specially curated collection of adidas Cricket Bats – Cricket Bats Com featuring trusted brands that deliver durability and superior performance for every player.

Don’t let a worn or unreliable bat hold you back. Visit Home page – Cricket Bats Com now to browse top-tier cricket bats and gear designed to enhance your match readiness. With easy browsing, detailed reviews, free shipping and expert customer service at https://cricketbats.com you can confidently upgrade today and step onto the field fully equipped.
Frequently Asked Questions
How do I set up my workspace for cricket bat repair?
To ensure a successful cricket bat repair, choose a clean, dry, and well-ventilated area with a sturdy work surface. Spread a protective cloth over your workspace to catch debris and make clean-up easier.
What tools do I need for cricket bat maintenance?
Essential tools for cricket bat maintenance include linseed oil, various grades of sandpaper, wood glue, clamps or binding twine, lint-free cloths, gloves, a sharp craft knife, and a measuring tape. Gather these items before starting the repair process to streamline your workflow.
How do I clean and inspect my cricket bat before repair?
Start by gently wiping down the bat with a soft, lint-free cloth to remove dirt and dust. Inspect the bat under natural light for hairline cracks, surface damage, and signs of moisture penetration—making sure to check areas around the handle connection and the striking surface thoroughly.
What is the best way to repair hairline cracks on a cricket bat?
For hairline cracks, apply high-quality wood glue into the crack using a thin applicator, then clamp the area gently. Allow the glue to set, and sand the repaired area with progressively finer sandpaper to ensure a smooth finish.
How do I properly sand and finish my cricket bat?
Use progressively finer sandpaper, starting from 120-grit to 400-grit, and sand along the wood grain to remove imperfections. After sanding, wipe away the dust and apply a thin layer of raw linseed oil to nourish and protect the bat’s wood.
What steps should I take to test if my cricket bat is ready for use?
First, perform a tap test along the bat’s surface, listening for consistent sound quality and smooth striking response. Conduct a controlled practice swing to assess the balance and feel of the bat, ensuring it moves smoothly without any wobbling.
Recommended
- The Essentials of Making a Cricket Bat With Artistry – Cricket Bats Com
- Cricket Bat Warranty Explained: Protecting Your Investment – Cricket Bats Com
- How to Refurbish Cricket Bat for Peak Performance – Cricket Bats Com
- Cricket Bat Maintenance Explained: Boost Performance & Lifespan – Cricket Bats Com
Cricket bats endure intense wear throughout matches and practice, leaving even the most passionate player searching for ways to restore their favourite blade. Tackling repairs yourself not only saves money but also offers a direct route to extending the life and performance of your bat. From gathering the right tools to mastering cricket bat repair basics, this practical guide walks you through each step so you can confidently bring your bat back to its best and ready for the next innings.
Table of Contents
- Step 1: Prepare Essential Tools And Workspace
- Step 2: Clean And Inspect The Cricket Bat Thoroughly
- Step 3: Repair Cracks And Surface Damage Meticulously
- Step 4: Sand And Refinish The Bat For Smoothness
- Step 5: Test And Verify Bat Readiness
Quick Summary
| Key Point | Explanation |
|---|---|
| 1. Gather essential tools and materials | Use linseed oil, sandpapers, wood glue, clamps, and cloths for effective bat maintenance and repairs. |
| 2. Clean and inspect the bat thoroughly | Examine the bat for cracks and structural weakness; ensure a clean surface before repairs. |
| 3. Repair damage with precision | Apply wood glue for cracks, use clamps securely, and sand down repairs seamlessly for best results. |
| 4. Sand and refinish for optimal performance | Sand the bat to remove imperfections, then apply linseed oil to nourish and protect the wood. |
| 5. Test the bat post-repair | Conduct a tap test and practice swings to verify the bat’s responsiveness and structural integrity before use. |
Step 1: Prepare essential tools and workspace
Successful cricket bat repair begins with meticulous preparation. Setting up your workspace and gathering the right tools will make the entire restoration process smoother and more effective.
Your repair toolkit should include several key items for comprehensive bat maintenance. Essential cricket bat repair tools include:
- Linseed oil for conditioning the wood
- Sandpapers with varying grit levels (120, 240, and 400)
- Wood glue for structural repairs
- Clamps or binding twine for securing repairs
- Clean, lint-free cloths
- Protective gloves
- Sharp craft knife
- Measuring tape
A well-organised workspace is crucial for preventing moisture damage and ensuring precise repairs.
Choose a clean, dry, and well-ventilated area with a sturdy work surface. Proper repair environment is essential for preventing additional wood damage during maintenance. Spread a protective cloth or newspaper over your workspace to catch any debris and make clean-up easier.
Top tip: Always work in a temperature-controlled environment between 18-22°C for optimal adhesive curing and wood treatment.
Step 2: Clean and inspect the cricket bat thoroughly
Thorough cleaning and inspection are critical first steps in cricket bat maintenance. Your goal is to identify any potential damage and prepare the bat’s surface for subsequent repair work.
Begin by carefully examining the cricket bat using natural light. Check the entire blade and handle systematically, looking for:
- Hairline cracks in the wood grain
- Surface wood splintering
- Areas of structural weakness
- Unusual colour changes or discolouration
- Damage around edges and corners
- Signs of moisture penetration
Close visual inspection reveals problems invisible during casual observation.
Using a soft, lint-free cloth, gently wipe down the entire bat to remove dirt, dust, and loose debris. Pay special attention to areas around the handle connection and striking surface. For stubborn dirt, slightly dampen the cloth with water, but avoid saturating the wood.
Expert suggestion: Use a magnifying glass to conduct a more detailed inspection, helping you spot microscopic cracks or damage that might escape casual observation.
Step 3: Repair cracks and surface damage meticulously
Repairing cricket bat damage requires precision and patience. Your goal is to restore the bat’s structural integrity and prevent further deterioration while maintaining its performance capabilities.
Cricket bat crack repair techniques involve several critical steps to ensure a robust and lasting fix. Start by selecting the appropriate repair method based on the damage type:
Here is a quick reference for cricket bat damage types and recommended repair approaches:
| Damage Type | Likely Cause | Recommended Repair Method |
|---|---|---|
| Hairline crack | General wear or ageing | Wood glue and gentle clamping |
| Deep split | Heavy impact or misuse | Glue, clamp, and reinforcing tape |
| Edge chipping | Repeated ball contact | Sanding and edge tape wrapping |
| Handle looseness | Poor fix or moisture | Wood glue and re-binding |
- Surface-level hairline cracks
- Deep structural splits
- Edge damage
- Handle connection weaknesses
Precision in repair work determines the future performance of your cricket bat.
For minor surface cracks, apply high-quality wood glue carefully into the crack using a thin applicator. Clamp the area firmly but gently to ensure the glue penetrates completely. For more substantial damage, consider reinforcing the repair by wrapping the area with protective tape after the glue has dried.
Once the glue sets, sand the repaired area smoothly using progressively finer sandpaper to blend the repair seamlessly with the surrounding wood. Finish by applying a thin layer of linseed oil to protect and seal the repaired section.
Expert suggestion: Allow at least 24 hours of drying time for repairs, and avoid using the bat until the glue has completely cured to prevent compromising the structural repair.
Step 4: Sand and refinish the bat for smoothness
Sanding and refinishing represent the final transformation of your cricket bat, restoring its pristine surface and protecting its structural integrity. This crucial stage determines the bat’s final performance and aesthetic quality.
Sanding techniques for cricket bats require a systematic approach to achieve a flawless finish. Begin with the following essential steps:
- Use progressively finer sandpaper (starting from 120-grit to 400-grit)
- Sand along the wood grain consistently
- Remove all surface imperfections
- Maintain even pressure during sanding
- Clean dust between sanding stages
Precision in sanding determines the bat’s final performance and durability.
Apply light, even strokes using each successive sandpaper grade, ensuring you remove previous scratches and create a uniformly smooth surface. After completing the sanding process, prepare the bat for oiling by wiping away all dust with a clean, lint-free cloth.
Finish by applying a thin layer of raw linseed oil, allowing it to absorb completely. This final treatment nourishes the wood, enhances its flexibility, and provides critical protection against moisture and environmental damage.
Compare the roles of sanding and oiling in bat refurbishment:
| Task | Purpose | Impact on Performance |
|---|---|---|
| Sanding | Smooths and removes blemishes | Improves strike and visual appeal |
| Oiling | Nourishes and seals wood | Increases flexibility and durability |
Expert suggestion: Allow the bat to rest for at least 12 hours after oiling, ensuring complete absorption and preventing excess oil from compromising your grip during play.
Step 5: Test and verify bat readiness
The final stage of cricket bat repair involves meticulously verifying that your restoration work has successfully returned the bat to peak performance. This crucial evaluation ensures the bat is safe and ready for competitive play.
Comprehensive bat testing methods require a systematic approach to assess structural integrity and responsiveness. Conduct these essential checks:
- Tap test along the bat’s surface
- Listen for consistent sound quality
- Check for smooth striking response
- Verify handle stability
- Examine visual alignment
- Test overall weight distribution
A well-repaired cricket bat should feel natural and responsive during initial testing.
Begin by gently tapping the bat with a cricket ball, paying close attention to any unusual sounds or vibrations. Rotate the bat systematically, checking for uniform response across different sections. Areas that sound hollow or produce inconsistent tones might indicate incomplete repairs or underlying structural weaknesses.
Finally, perform a controlled practice swing to assess the bat’s balance and feel. Your restored bat should move smoothly, with no unexpected wobbling or resistance that might compromise your playing technique.
Expert suggestion: Conduct your final test in similar conditions to your actual playing environment, as temperature and humidity can subtly affect bat performance.
Restore Your Game with the Right Cricket Bat
Maintaining your cricket bat to peak performance means addressing issues like hairline cracks, deep splits and edge damage with precision and care. If the repair process feels daunting or your bat has seen better days, upgrading to a new, high-quality cricket bat could be the game changer you need. Explore our specially curated collection of adidas Cricket Bats – Cricket Bats Com featuring trusted brands that deliver durability and superior performance for every player.
Don’t let a worn or unreliable bat hold you back. Visit Home page – Cricket Bats Com now to browse top-tier cricket bats and gear designed to enhance your match readiness. With easy browsing, detailed reviews, free shipping and expert customer service at https://cricketbats.com you can confidently upgrade today and step onto the field fully equipped.
Frequently Asked Questions
How do I set up my workspace for cricket bat repair?
To ensure a successful cricket bat repair, choose a clean, dry, and well-ventilated area with a sturdy work surface. Spread a protective cloth over your workspace to catch debris and make clean-up easier.
What tools do I need for cricket bat maintenance?
Essential tools for cricket bat maintenance include linseed oil, various grades of sandpaper, wood glue, clamps or binding twine, lint-free cloths, gloves, a sharp craft knife, and a measuring tape. Gather these items before starting the repair process to streamline your workflow.
How do I clean and inspect my cricket bat before repair?
Start by gently wiping down the bat with a soft, lint-free cloth to remove dirt and dust. Inspect the bat under natural light for hairline cracks, surface damage, and signs of moisture penetration—making sure to check areas around the handle connection and the striking surface thoroughly.
What is the best way to repair hairline cracks on a cricket bat?
For hairline cracks, apply high-quality wood glue into the crack using a thin applicator, then clamp the area gently. Allow the glue to set, and sand the repaired area with progressively finer sandpaper to ensure a smooth finish.
How do I properly sand and finish my cricket bat?
Use progressively finer sandpaper, starting from 120-grit to 400-grit, and sand along the wood grain to remove imperfections. After sanding, wipe away the dust and apply a thin layer of raw linseed oil to nourish and protect the bat’s wood.
What steps should I take to test if my cricket bat is ready for use?
First, perform a tap test along the bat’s surface, listening for consistent sound quality and smooth striking response. Conduct a controlled practice swing to assess the balance and feel of the bat, ensuring it moves smoothly without any wobbling.
Recommended
- The Essentials of Making a Cricket Bat With Artistry – Cricket Bats Com
- Cricket Bat Warranty Explained: Protecting Your Investment – Cricket Bats Com
- How to Refurbish Cricket Bat for Peak Performance – Cricket Bats Com
- Cricket Bat Maintenance Explained: Boost Performance & Lifespan – Cricket Bats Com