
News News
Cricket Bat Maintenance Guide for Peak Performance Cricket Bat Maintenance Guide for Peak Performance
Finding the right approach to cricket bat care can be confusing, especially when every detail might impact your game. Players aiming for consistency know that maintaining a bat is more than just routine cleaning. The quality of willow—English or Kashmir—determines how carefully you need to prepare and protect your bat. This guide reveals practical steps and expert strategies to keep your bat performing at its best every season.
Table of Contents
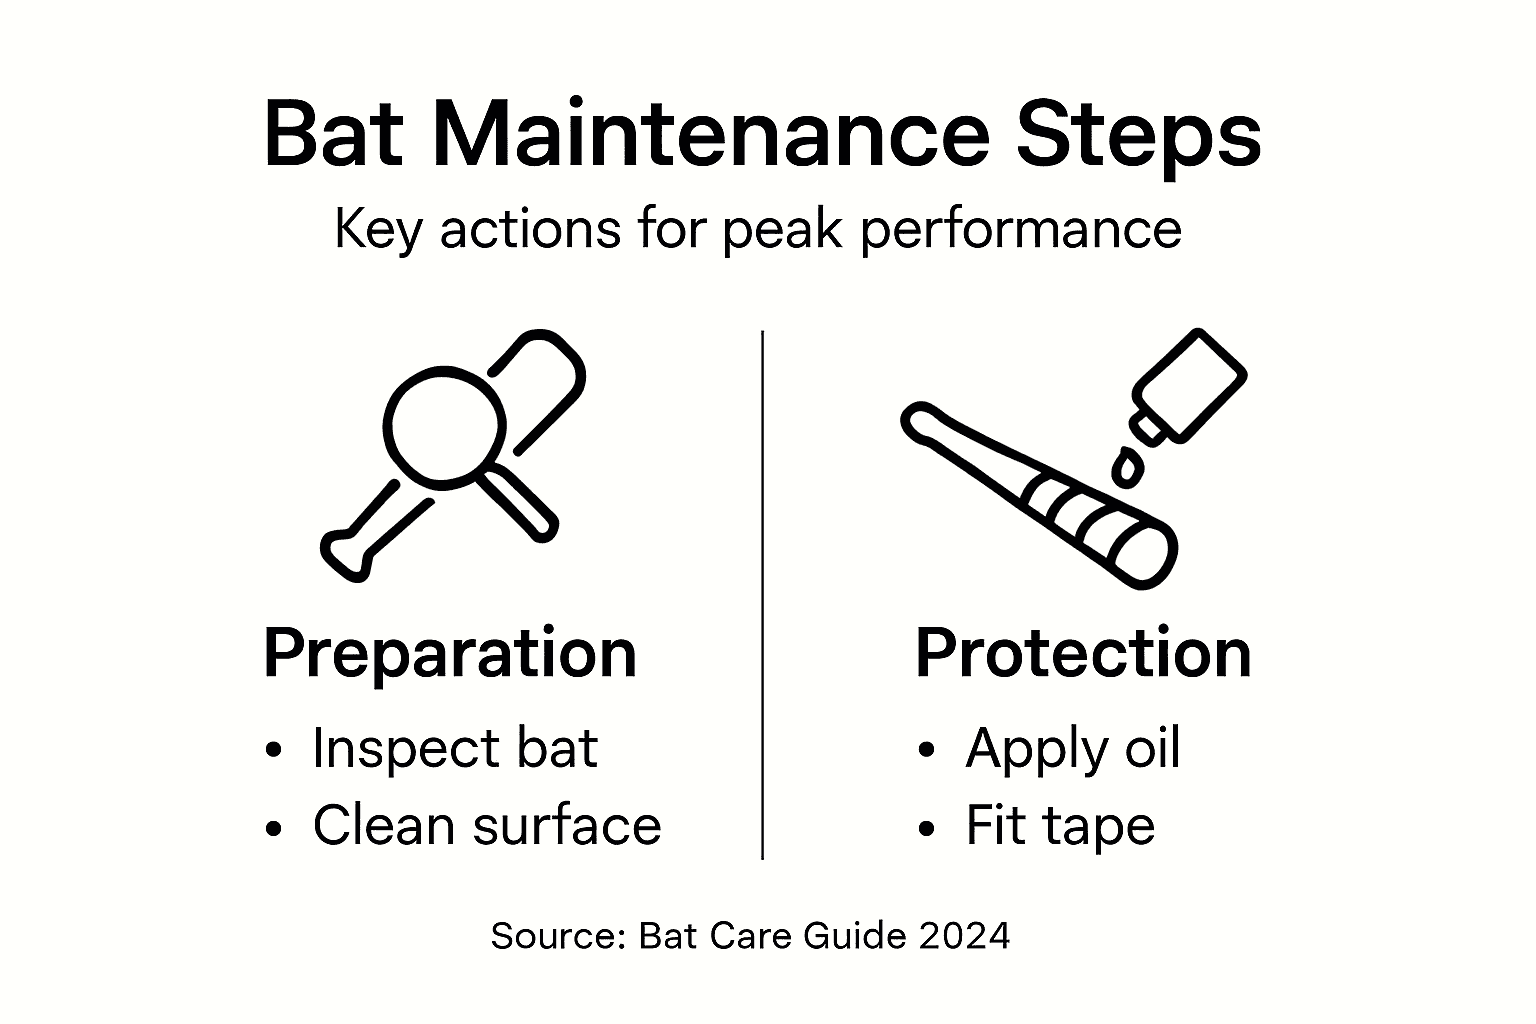
- Step 1: Prepare Cricket Bat And Cleaning Materials
- Step 2: Clean And Inspect Your Bat Thoroughly
- Step 3: Apply Protective Oil To The Blade
- Step 4: Fit A Suitable Anti-Scuff Sheet And Edge Tape
- Step 5: Test Bat Balance And Performance After Care
Quick Summary
| Essential Insight | Detailed Explanation |
|---|---|
| 1. Select proper cleaning materials | Use a soft cloth, linseed oil, and a brush for effective bat maintenance to ensure longevity and performance. |
| 2. Regularly inspect for damage | Check for cracks, lifting fibres, and discolouration to address issues before they become severe problems. |
| 3. Apply protective oil correctly | Use thin layers of linseed oil along the wood grain, allowing adequate drying time to protect against moisture damage. |
| 4. Use anti-scuff sheets effectively | Apply high-quality protective sheets and edge tape to prevent impact damage, extending your bat’s lifespan during play. |
| 5. Assess bat performance post-maintenance | Conduct balance tests and inspect for even weight distribution to ensure optimal performance and detect any maintenance needs. |
Step 1: Prepare cricket bat and cleaning materials
Before diving into cricket bat maintenance, you’ll need to gather specific tools and understand the preparation process. Proper preparation ensures that your bat remains in top condition and performs optimally during play.
To start, collect the essential materials for cleaning and maintaining your cricket bat. These include:
- Soft, clean cotton cloth or microfibre towel
- Fine-grained sandpaper (optional)
- Linseed oil (cricket bat grade)
- Clean, lint-free cloth for oil application
- Soft brush for dust removal
When selecting your bat, understanding the cricket bat materials and grades is crucial. Different willow types - English and Kashmir - have unique characteristics that impact maintenance requirements. English willow, being premium, demands more careful handling compared to Kashmir willow.
Here’s a comparison of English willow and Kashmir willow to help guide your bat selection:
| Attribute | English Willow | Kashmir Willow |
|---|---|---|
| Wood Quality | Premium, fine-grained | Hard, less uniform |
| Maintenance Needs | Frequent, careful | Less frequent, moderate |
| Suitability | Professional matches | Practice or entry-level |
| Lifespan | Longer with proper care | Moderate |
Selecting the right materials and preparing carefully can significantly extend your cricket bat’s performance and lifespan.
Before beginning maintenance, inspect your bat thoroughly. Check for any existing damage, cracks, or areas requiring special attention. Ensure your workspace is clean, dry, and well-lit, providing optimal conditions for bat care.
Professional advice: Always store your cleaning materials in a cool, dry place to prevent contamination and maintain their effectiveness.
Step 2: Clean and inspect your bat thoroughly
Thoroughly cleaning and inspecting your cricket bat is essential for maintaining its performance and preventing potential damage. This crucial step ensures your bat remains in top condition after each match or practice session.
Begin by carefully examining surface conditions for any signs of wear or damage. Use a soft, clean cloth to gently wipe the bat’s entire surface, paying special attention to the following areas:
- Face of the bat
- Edges and shoulders
- Toe area
- Handle connection point
During inspection, look for specific warning signs that might indicate potential issues:
This table summarises key warning signs during bat inspection, plus recommended actions:
| Warning Sign | Probable Cause | Recommended Action |
|---|---|---|
| Hairline cracks | Dryness, impact stress | Light oiling, monitor |
| Lifting wood fibres | Moisture, damage | Sand smooth, oil surface |
| Discoloured spots | Water exposure, fungus | Clean, dry thoroughly |
| Uneven texture | Aging, poor storage | Sand gently, oil |
- Hairline cracks along the grain
- Loose or lifting wood fibres
- Uneven surface texture
- Dark or discoloured spots
- Signs of previous impact damage
Consistent and thorough inspection can prevent minor damage from becoming significant performance-limiting problems.
Cleaning techniques are critical for maintaining your bat’s integrity. Always use a soft, lint-free cloth and avoid saturating the wood with moisture. Gently remove dust, sweat, and grime, working along the wood grain to prevent potential damage.
Professional advice: Keep a dedicated soft cloth exclusively for cricket bat maintenance to prevent cross-contamination and potential damage.
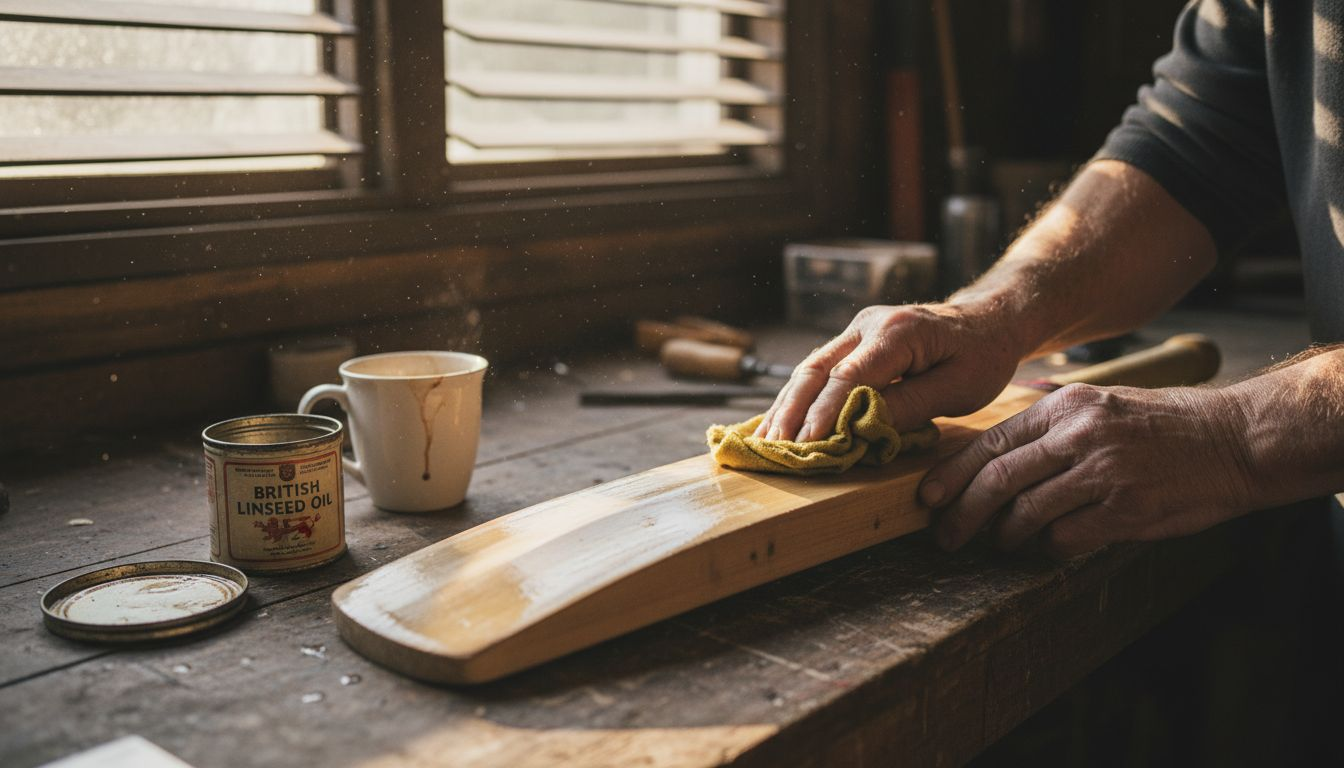
Step 3: Apply protective oil to the blade
Applying protective oil to your cricket bat is a critical maintenance step that preserves wood integrity and prevents moisture damage. This process helps maintain the bat’s performance and extends its overall lifespan.
Choose a high-quality linseed oil specifically designed for cricket bats. Performance cricket bat maintenance requires careful application with precise techniques:
- Use pure, raw linseed oil
- Apply thin, even layers
- Work along the wood grain
- Avoid over-saturating the blade
- Allow sufficient drying time between coats
Follow these detailed steps for optimal oiling:
- Ensure the bat surface is completely clean and dry
- Use a lint-free cloth for oil application
- Apply a minimal amount of oil using gentle, smooth strokes
- Spread oil evenly across the bat’s surface
- Let the oil absorb for 24 hours before additional treatment
Proper oiling creates a protective barrier that prevents wood fibres from drying and cracking.
Warning signs that indicate your bat needs oiling include visible dry patches, reduced surface sheen, and developing small surface cracks. Regular maintenance prevents long-term structural damage.
Professional advice: Always store your linseed oil in a cool, dark place to maintain its quality and prevent rancidity.
Step 4: Fit a suitable anti-scuff sheet and edge tape
Protecting your cricket bat’s surface and edges is crucial for maintaining its structural integrity and performance. Anti-scuff sheets and edge tape provide critical defence against impact damage during play.
Cricket bat maintenance strategies recommend selecting high-quality protective materials that match your bat’s specific characteristics. When choosing and applying these protective layers, consider the following:
- Select sheets specifically designed for cricket bats
- Ensure precise measurements before application
- Use clean, dry surfaces for best adhesion
- Smooth out any air bubbles during application
- Trim excess material carefully
Follow these detailed steps for professional application:
- Clean the bat surface thoroughly
- Measure and cut anti-scuff sheet accurately
- Align sheet carefully along bat’s face
- Apply sheet with gentle, consistent pressure
- Trim edges for a seamless finish
- Apply edge tape to protect vulnerable areas
Proper protective covering can significantly extend your cricket bat’s operational lifespan.
Important considerations include matching the sheet’s material to your bat’s wood type and playing conditions. Cheaper materials might compromise your bat’s performance and durability.
Professional advice: Always purchase protection materials from reputable cricket equipment specialists to ensure optimal quality and fit.
Step 5: Test bat balance and performance after care
After completing your cricket bat maintenance routine, a thorough performance assessment ensures all your careful work translates into optimal playing conditions. Understanding how your bat responds post-maintenance is crucial for continued performance.
Cricket bat performance factors suggest conducting several targeted tests to evaluate your bat’s condition:
- Check overall bat weight and balance
- Test bat’s responsiveness during practice swings
- Inspect surface integrity after maintenance
- Verify edge and face protection effectiveness
- Listen for any unusual sounds during movement
Perform these specific evaluation techniques:
- Conduct gentle tap test along bat’s face
- Swing bat in controlled practice motion3. Check for smooth, consistent weight distribution
- Examine anti-scuff sheet and edge tape alignment
- Validate oil absorption and surface finish
A meticulously maintained bat can significantly enhance your batting performance and technique.
Warning indicators that might suggest further maintenance include uneven weight distribution, unusual vibration during swing, or visible surface irregularities. Always address these signs promptly to prevent potential damage.
Professional advice: Perform these tests in a controlled environment with consistent lighting to accurately assess your bat’s condition.
Maintain Your Cricket Bat Like a Pro with the Right Equipment
Keeping your cricket bat in peak condition requires dedication and the right tools. From selecting premium willow to applying protective oil and anti-scuff sheets, each step in the maintenance guide ensures your bat performs flawlessly. Avoid common pitfalls such as dry cracks or uneven weight distribution by using specialised products designed for cricket bats.

Explore our range of expertly crafted cricket bats, including the latest New Balance Cricket Bats – Cricket Bats Com and adidas Cricket Bats – Cricket Bats Com. With quality gear from trusted brands and professional-grade accessories available at cricketbats.com, you can protect your investment and enhance your performance today. Start your maintenance journey with us now and experience the difference tailored cricket equipment makes.
Frequently Asked Questions
What cleaning materials do I need for cricket bat maintenance?
To maintain your cricket bat, gather a soft, clean cotton cloth or microfibre towel, fine-grained sandpaper (optional), linseed oil (cricket bat grade), and a soft brush for dust removal. Start by using the cloth to wipe away dust and grime after each use, ensuring your bat remains in optimal condition.
How often should I apply linseed oil to my cricket bat?
Apply linseed oil to your cricket bat approximately every 30–60 days, or whenever you notice visible dry patches or reduced sheen on the surface. Use a lint-free cloth to spread a thin, even layer along the wood grain for effective moisture protection.
What signs indicate that my cricket bat needs maintenance?
Look for hairline cracks, lifting wood fibres, discoloured spots, and uneven texture during your inspections. Address these issues immediately with appropriate cleaning, sanding, or oiling to prevent further damage and maintain performance.
How do I fit an anti-scuff sheet and edge tape on my cricket bat?
Begin by cleaning the bat surface thoroughly, then measure and cut the anti-scuff sheet accurately to fit the bat’s face. Smoothly apply the sheet and edge tape to protect against impact damage, ensuring no air bubbles remain for optimal adhesion.
How do I test my cricket bat after maintenance?
To evaluate your bat’s performance after maintenance, check its weight and balance, conduct a gentle tap test along the face, and inspect the integrity of the protective covering. Perform these tests to ensure even weight distribution and surface smoothness, confirming your bat is ready for play.
Recommended
- Cricket Bat Warranty Explained: Protecting Your Investment – Cricket Bats Com
- The Essentials of Making a Cricket Bat With Artistry – Cricket Bats Com
- Cricket Bat Maintenance Explained: Boost Performance & Lifespan – Cricket Bats Com
- Cricket Bat Care 2025: Maximising Bat Life and Power – Cricket Bats Com
Finding the right approach to cricket bat care can be confusing, especially when every detail might impact your game. Players aiming for consistency know that maintaining a bat is more than just routine cleaning. The quality of willow—English or Kashmir—determines how carefully you need to prepare and protect your bat. This guide reveals practical steps and expert strategies to keep your bat performing at its best every season.
Table of Contents
- Step 1: Prepare Cricket Bat And Cleaning Materials
- Step 2: Clean And Inspect Your Bat Thoroughly
- Step 3: Apply Protective Oil To The Blade
- Step 4: Fit A Suitable Anti-Scuff Sheet And Edge Tape
- Step 5: Test Bat Balance And Performance After Care
Quick Summary
| Essential Insight | Detailed Explanation |
|---|---|
| 1. Select proper cleaning materials | Use a soft cloth, linseed oil, and a brush for effective bat maintenance to ensure longevity and performance. |
| 2. Regularly inspect for damage | Check for cracks, lifting fibres, and discolouration to address issues before they become severe problems. |
| 3. Apply protective oil correctly | Use thin layers of linseed oil along the wood grain, allowing adequate drying time to protect against moisture damage. |
| 4. Use anti-scuff sheets effectively | Apply high-quality protective sheets and edge tape to prevent impact damage, extending your bat’s lifespan during play. |
| 5. Assess bat performance post-maintenance | Conduct balance tests and inspect for even weight distribution to ensure optimal performance and detect any maintenance needs. |
Step 1: Prepare cricket bat and cleaning materials
Before diving into cricket bat maintenance, you’ll need to gather specific tools and understand the preparation process. Proper preparation ensures that your bat remains in top condition and performs optimally during play.
To start, collect the essential materials for cleaning and maintaining your cricket bat. These include:
- Soft, clean cotton cloth or microfibre towel
- Fine-grained sandpaper (optional)
- Linseed oil (cricket bat grade)
- Clean, lint-free cloth for oil application
- Soft brush for dust removal
When selecting your bat, understanding the cricket bat materials and grades is crucial. Different willow types - English and Kashmir - have unique characteristics that impact maintenance requirements. English willow, being premium, demands more careful handling compared to Kashmir willow.
Here’s a comparison of English willow and Kashmir willow to help guide your bat selection:
| Attribute | English Willow | Kashmir Willow |
|---|---|---|
| Wood Quality | Premium, fine-grained | Hard, less uniform |
| Maintenance Needs | Frequent, careful | Less frequent, moderate |
| Suitability | Professional matches | Practice or entry-level |
| Lifespan | Longer with proper care | Moderate |
Selecting the right materials and preparing carefully can significantly extend your cricket bat’s performance and lifespan.
Before beginning maintenance, inspect your bat thoroughly. Check for any existing damage, cracks, or areas requiring special attention. Ensure your workspace is clean, dry, and well-lit, providing optimal conditions for bat care.
Professional advice: Always store your cleaning materials in a cool, dry place to prevent contamination and maintain their effectiveness.
Step 2: Clean and inspect your bat thoroughly
Thoroughly cleaning and inspecting your cricket bat is essential for maintaining its performance and preventing potential damage. This crucial step ensures your bat remains in top condition after each match or practice session.
Begin by carefully examining surface conditions for any signs of wear or damage. Use a soft, clean cloth to gently wipe the bat’s entire surface, paying special attention to the following areas:
- Face of the bat
- Edges and shoulders
- Toe area
- Handle connection point
During inspection, look for specific warning signs that might indicate potential issues:
This table summarises key warning signs during bat inspection, plus recommended actions:
| Warning Sign | Probable Cause | Recommended Action |
|---|---|---|
| Hairline cracks | Dryness, impact stress | Light oiling, monitor |
| Lifting wood fibres | Moisture, damage | Sand smooth, oil surface |
| Discoloured spots | Water exposure, fungus | Clean, dry thoroughly |
| Uneven texture | Aging, poor storage | Sand gently, oil |
- Hairline cracks along the grain
- Loose or lifting wood fibres
- Uneven surface texture
- Dark or discoloured spots
- Signs of previous impact damage
Consistent and thorough inspection can prevent minor damage from becoming significant performance-limiting problems.
Cleaning techniques are critical for maintaining your bat’s integrity. Always use a soft, lint-free cloth and avoid saturating the wood with moisture. Gently remove dust, sweat, and grime, working along the wood grain to prevent potential damage.
Professional advice: Keep a dedicated soft cloth exclusively for cricket bat maintenance to prevent cross-contamination and potential damage.
Step 3: Apply protective oil to the blade
Applying protective oil to your cricket bat is a critical maintenance step that preserves wood integrity and prevents moisture damage. This process helps maintain the bat’s performance and extends its overall lifespan.
Choose a high-quality linseed oil specifically designed for cricket bats. Performance cricket bat maintenance requires careful application with precise techniques:
- Use pure, raw linseed oil
- Apply thin, even layers
- Work along the wood grain
- Avoid over-saturating the blade
- Allow sufficient drying time between coats
Follow these detailed steps for optimal oiling:
- Ensure the bat surface is completely clean and dry
- Use a lint-free cloth for oil application
- Apply a minimal amount of oil using gentle, smooth strokes
- Spread oil evenly across the bat’s surface
- Let the oil absorb for 24 hours before additional treatment
Proper oiling creates a protective barrier that prevents wood fibres from drying and cracking.
Warning signs that indicate your bat needs oiling include visible dry patches, reduced surface sheen, and developing small surface cracks. Regular maintenance prevents long-term structural damage.
Professional advice: Always store your linseed oil in a cool, dark place to maintain its quality and prevent rancidity.
Step 4: Fit a suitable anti-scuff sheet and edge tape
Protecting your cricket bat’s surface and edges is crucial for maintaining its structural integrity and performance. Anti-scuff sheets and edge tape provide critical defence against impact damage during play.
Cricket bat maintenance strategies recommend selecting high-quality protective materials that match your bat’s specific characteristics. When choosing and applying these protective layers, consider the following:
- Select sheets specifically designed for cricket bats
- Ensure precise measurements before application
- Use clean, dry surfaces for best adhesion
- Smooth out any air bubbles during application
- Trim excess material carefully
Follow these detailed steps for professional application:
- Clean the bat surface thoroughly
- Measure and cut anti-scuff sheet accurately
- Align sheet carefully along bat’s face
- Apply sheet with gentle, consistent pressure
- Trim edges for a seamless finish
- Apply edge tape to protect vulnerable areas
Proper protective covering can significantly extend your cricket bat’s operational lifespan.
Important considerations include matching the sheet’s material to your bat’s wood type and playing conditions. Cheaper materials might compromise your bat’s performance and durability.
Professional advice: Always purchase protection materials from reputable cricket equipment specialists to ensure optimal quality and fit.
Step 5: Test bat balance and performance after care
After completing your cricket bat maintenance routine, a thorough performance assessment ensures all your careful work translates into optimal playing conditions. Understanding how your bat responds post-maintenance is crucial for continued performance.
Cricket bat performance factors suggest conducting several targeted tests to evaluate your bat’s condition:
- Check overall bat weight and balance
- Test bat’s responsiveness during practice swings
- Inspect surface integrity after maintenance
- Verify edge and face protection effectiveness
- Listen for any unusual sounds during movement
Perform these specific evaluation techniques:
- Conduct gentle tap test along bat’s face
- Swing bat in controlled practice motion3. Check for smooth, consistent weight distribution
- Examine anti-scuff sheet and edge tape alignment
- Validate oil absorption and surface finish
A meticulously maintained bat can significantly enhance your batting performance and technique.
Warning indicators that might suggest further maintenance include uneven weight distribution, unusual vibration during swing, or visible surface irregularities. Always address these signs promptly to prevent potential damage.
Professional advice: Perform these tests in a controlled environment with consistent lighting to accurately assess your bat’s condition.
Maintain Your Cricket Bat Like a Pro with the Right Equipment
Keeping your cricket bat in peak condition requires dedication and the right tools. From selecting premium willow to applying protective oil and anti-scuff sheets, each step in the maintenance guide ensures your bat performs flawlessly. Avoid common pitfalls such as dry cracks or uneven weight distribution by using specialised products designed for cricket bats.
Explore our range of expertly crafted cricket bats, including the latest New Balance Cricket Bats – Cricket Bats Com and adidas Cricket Bats – Cricket Bats Com. With quality gear from trusted brands and professional-grade accessories available at cricketbats.com, you can protect your investment and enhance your performance today. Start your maintenance journey with us now and experience the difference tailored cricket equipment makes.
Frequently Asked Questions
What cleaning materials do I need for cricket bat maintenance?
To maintain your cricket bat, gather a soft, clean cotton cloth or microfibre towel, fine-grained sandpaper (optional), linseed oil (cricket bat grade), and a soft brush for dust removal. Start by using the cloth to wipe away dust and grime after each use, ensuring your bat remains in optimal condition.
How often should I apply linseed oil to my cricket bat?
Apply linseed oil to your cricket bat approximately every 30–60 days, or whenever you notice visible dry patches or reduced sheen on the surface. Use a lint-free cloth to spread a thin, even layer along the wood grain for effective moisture protection.
What signs indicate that my cricket bat needs maintenance?
Look for hairline cracks, lifting wood fibres, discoloured spots, and uneven texture during your inspections. Address these issues immediately with appropriate cleaning, sanding, or oiling to prevent further damage and maintain performance.
How do I fit an anti-scuff sheet and edge tape on my cricket bat?
Begin by cleaning the bat surface thoroughly, then measure and cut the anti-scuff sheet accurately to fit the bat’s face. Smoothly apply the sheet and edge tape to protect against impact damage, ensuring no air bubbles remain for optimal adhesion.
How do I test my cricket bat after maintenance?
To evaluate your bat’s performance after maintenance, check its weight and balance, conduct a gentle tap test along the face, and inspect the integrity of the protective covering. Perform these tests to ensure even weight distribution and surface smoothness, confirming your bat is ready for play.
Recommended
- Cricket Bat Warranty Explained: Protecting Your Investment – Cricket Bats Com
- The Essentials of Making a Cricket Bat With Artistry – Cricket Bats Com
- Cricket Bat Maintenance Explained: Boost Performance & Lifespan – Cricket Bats Com
- Cricket Bat Care 2025: Maximising Bat Life and Power – Cricket Bats Com